I’d already written the setup instructions for Object Tracking. They told you what to do in Unity, but I kept thinking about the moment after you read a step. You switch back to the editor, look at the Inspector, and wonder if you’re looking at the right thing.
That’s why manuals have pictures. It’s quicker to spot five green lights in a picture and compare them with your screen than to read a description and work out where to look. I wanted to keep that side-by-side comparison and let people step through it at their own pace.
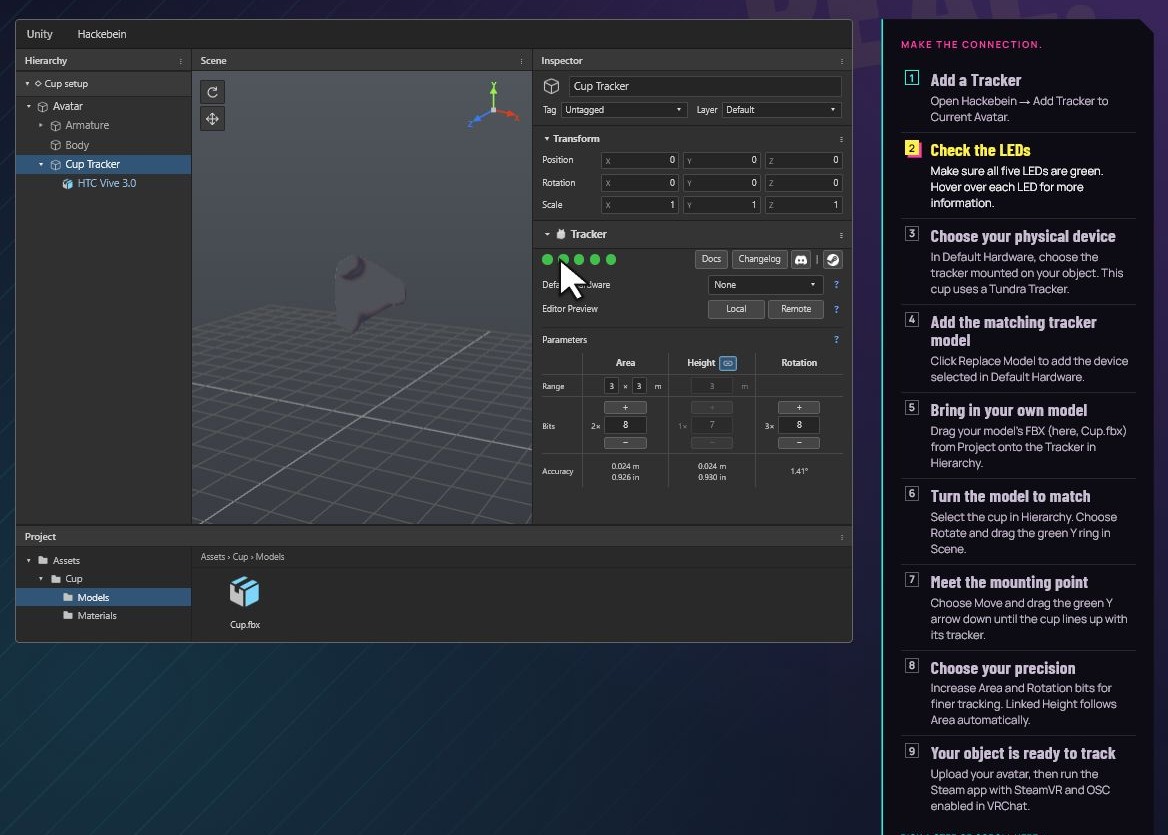
In the interactive setup guide, the illustrated Unity editor sits next to a list of steps. Pick Check the LEDs and the guide takes you straight to the Tracker component and its five green lights. You can leave it there while you check your own setup.
Let the reader decide when to move on 
The bit I wanted to try was giving people control of the pace. You can stop at the lights while you sort out your own setup, or jump back to see which menu added the tracker. You can also skip straight to the step you came for. Each click has a reason. It shows you what to look for or what should have changed.
There’s a small piece of research behind that hunch. Richard Mayer and Paul Chandler found that letting people advance an animation in sections helped them apply what they’d learned in a new situation, though it didn’t improve how much they remembered. They were teaching how lightning forms. My question is whether the same idea helps when you’re switching between a guide and your own Unity project. Mayer and Chandler, 2001
A README is handy when I need to look up a menu name. A video is handy when I want to see the whole thing done. With this guide, I’m trying to make it easier to pick up where you left off while you’re doing the work yourself.
Try the interactive setup guide